




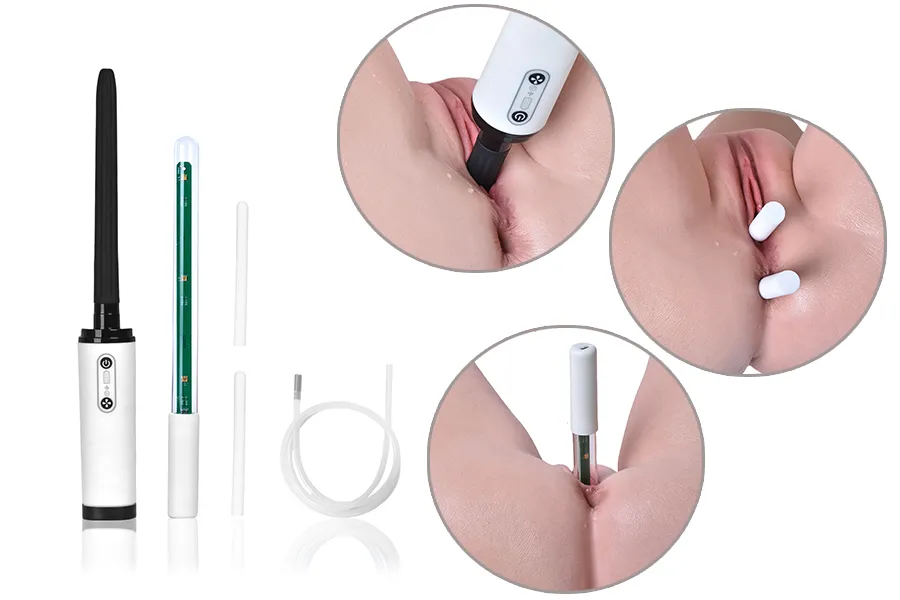
Properly cleaning a sex doll's vagina, mouth, and anus is an important part of routine care and maintenance. Cleaning the internal cavities after each use helps remove bodily fluids, lubricants, and other residue. Thorough rinsing, complete drying, and appropriate sanitizing can also help minimize odors and moisture buildup during storage.
For users of the Yeloly Electric Cleaning Kit, the right equipment and cleaning technique can make it easier to flush, dry, and sanitize the internal cavities of a realistic sex doll.
This step-by-step guide explains how to clean a sex doll's vagina, mouth, and anus, including preparing the cleaning water, flushing the internal cavities, draining and drying them thoroughly, using UV sanitization, and properly cleaning the equipment after use.
Important Safety Information: The electric cleaning kit described in this guide is intended only for cleaning the internal cavities of sex dolls, including the vagina, mouth, and anus. It is not intended for use on the human body. When using a UV sanitizing wand, never expose people, animals, or plants directly to UV light. Always follow the safety instructions and operating guidelines provided with the equipment.
How to Purchase an Electric Cleaning Kit
An Accessories section is available in the customization options for each sex doll. If you need an Electric Cleaning Kit, simply add it to your order when purchasing your doll. The cleaning kit will be shipped together with your sex doll.
What You Need Before Cleaning Your Doll
Before starting, prepare the following:
- An electric doll cleaning kit
- Drinking water, purified bottled water, or warm water
- A water container with a capacity of at least 1.5 liters
- The included water hose
- The included absorbent drying rod
- A suitable power source for the UV sanitizing wand if sanitization is required
The cleaning kit includes:
- 1 × Automatic flushing cleaner
- 1 × High-power UV sanitizing wand
- 2 × Absorbent drying rods
- 1 × Charging cable
- 1 × Water hose
- 1 × User manual
The kit does not include medication or cleaning solution and is supplied non-sterile.
How do I Clean It?
We recommend watching the video first to familiarize yourself with the components of the electric cleaning kit and learn how to properly assemble and use it. Then, follow the steps below to clean your doll.
Yeloly Electric Cleaning Kit
Step 1: Prepare the Cleaning Water
Start by filling a clean water container with suitable water.
The manufacturer's instructions recommend using drinking water, purified bottled water, or warm water. Avoid water containing visible particles, hair, mineral deposits, or other debris, because contaminants can enter the pump and potentially cause malfunctions.
Water temperature matters
The flushing water should not exceed 40°C (104°F).
The kit has a temperature indicator that changes from green to red when the water temperature exceeds 40°C. However, the manual notes that the temperature display may have a delay, so users should not rely on the indicator alone.
For practical use, lukewarm water is preferable to hot water.
Also keep a container of at least 1.5 L nearby to supply and collect water during the cleaning process.
Step 2: Connect the Automatic Flushing Cleaner
Connect the silicone hose to the inlet on the bottom of the flushing device.
Place the weighted end of the hose into the prepared water container. This allows the pump to draw water from the container during the cleaning process.
Before operating the cleaner:
- Check that the hose is securely connected.
- Make sure the weighted end is submerged in clean water.
- Confirm that the water temperature is suitable.
- Check the cleaning device for visible damage or signs of water intrusion.
If the button is damaged or water has entered the internal electronics, stop using the device immediately.
Step 3: Insert the Cleaning Head Correctly
Attach the rotating cleaning head to the main unit by matching the corresponding slots and pressing it into place.
When inserting the cleaning head into the doll's internal cavity, keep the device properly aligned and avoid forcing it.
The manufacturer's instructions specify holding the cleaner with the handle inverted and positioning the angled silicone cleaning head toward the opening before insertion.
Do not force the cleaning head into the cavity.
If the cavity is particularly dry, the manual recommends using a suitable lubricant before operation because insufficient lubrication may prevent the rotating mechanism from working properly.
Step 4: Start the Automatic Cleaning Cycle
Once the cleaning head is correctly positioned, press the flushing button.
The device first pumps water into the cavity and then activates the rotating function. The cleaning head rotates in both directions for a total of approximately 65 seconds.
According to the operating instructions:
- 1st press: starts the water-pumping/flushing mode
- 2nd press: activates the rotating function
- 3rd press: stops the pumping and rotating functions
- Long press: activates manual mode
- Release the button: stops manual operation
The automatic rotating cycle stops after approximately 65 seconds.
Use Cases
How long should you rinse?
For the automatic cycle, the manufacturer's preset cleaning cycle is approximately one minute.
The timer indicator remains red during the first minute and changes to green when the flushing process exceeds one minute. The flushing function automatically stops after one minute.
For routine post-use cleaning, following the manufacturer's automatic cycle is a straightforward starting point rather than repeatedly running the device unnecessarily.
Step 5: Drain the Remaining Water
After flushing, some water may remain inside the doll's internal cavity.
This is normal according to the product instructions.
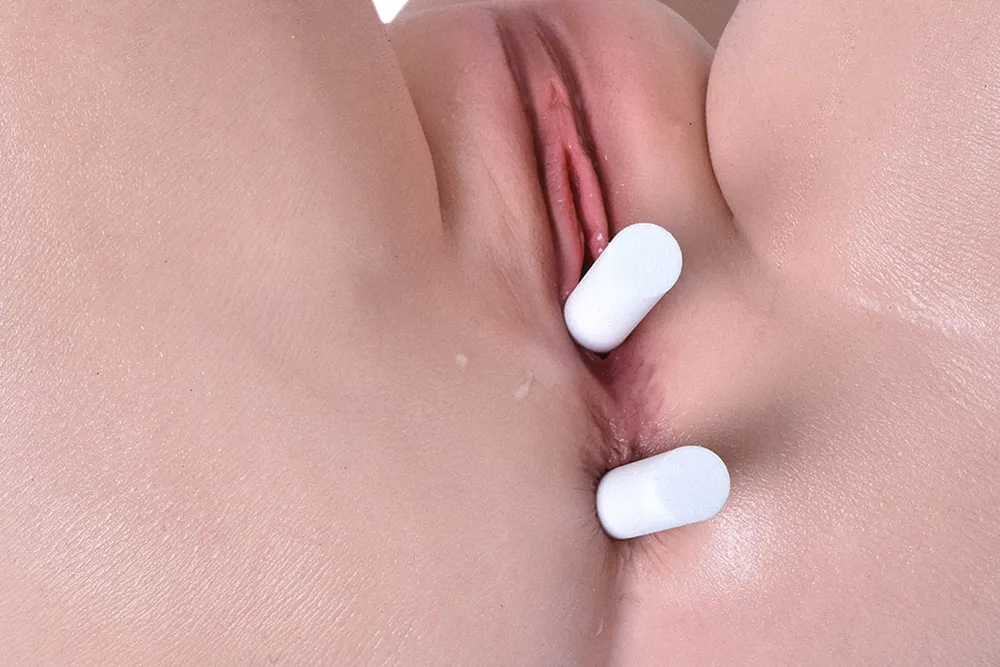
The included absorbent drying rod can be inserted into the cavity to absorb remaining moisture. The manual specifically recommends using the absorbent rod after cleaning to remove excess water.
How to use the absorbent rod
- Insert the absorbent rod gently into the cleaned cavity.
- Allow it to absorb residual moisture.
- Remove it carefully.
- Allow the reusable rod to air-dry or dry naturally before storing it.
The included absorbent rods are reusable.
Step 6: Use the UV Sanitizing Wand
For additional internal sanitization, the kit includes a UV sanitizing wand.
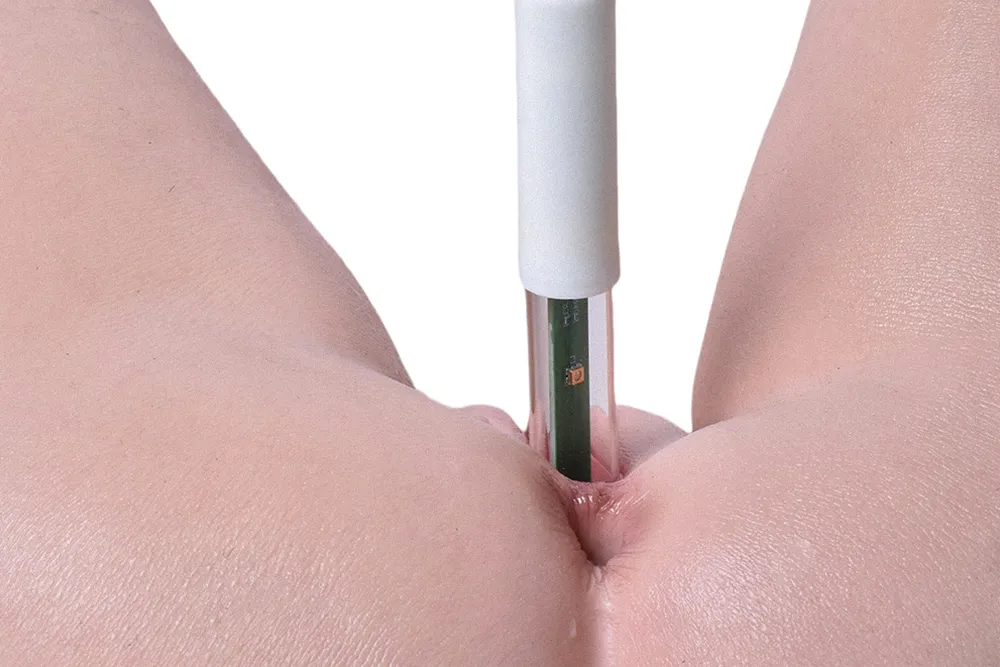
The manufacturer's instructions specify inserting the entire glass portion of the UV tube into the doll's internal cavity before switching on the UV light.
UV sanitizing procedure
- Insert the glass portion completely into the internal cavity.
- Make sure the UV light is positioned inside the cavity.
- Connect the wand to a suitable 5V USB power source.
- Switch on the UV light.
- Allow the sanitizing cycle to run for approximately 30 minutes.
- Disconnect the power first.
- Only then remove the UV wand from the doll.
The instructions state that the specified sanitizing time is 30 minutes and that the wand is designed to use a 5V input.
Important UV safety warning
UV light can be harmful to people and living organisms.
Never look directly at the UV light or operate the wand while exposing people, pets, or plants to the light.
The manual also warns that the transparent UV tube is made from special glass. Do not strike or drop it. If the glass tube breaks, discontinue use because broken glass can cause injury.
Step 7: Dry the Doll Before Storage
Cleaning does not end when the water stops flowing. Proper drying is equally important.
After rinsing and sanitizing:
- Remove remaining water with the absorbent rod.
- Allow the internal area to dry naturally when appropriate.
- Make sure the exterior is dry before storage.
- Avoid storing the doll while excessive moisture remains inside.
The manufacturer's instructions specifically recommend using the absorbent rod when water remains inside the cavity.
Step 8: Clean and Store the Cleaning Device
The cleaning equipment also needs routine care.
After use, disconnect the water hose from the water source and activate the device's drainage function while the suction tube is not in contact with water. Allow the remaining water to drain, then remove the hose and switch off the device.
The manual recommends:
- Drying the equipment after use.
- Lightly shaking out residual water from the hose before long-term storage.
- Keeping the equipment in its storage bag.
- Avoiding full immersion of the main unit.
- Never boiling the entire device.
- Avoiding drops or impacts that could damage the sealed housing.
Although the device uses a waterproof design, the manufacturer specifically states that the entire unit should not be submerged in water or boiled.
Electric Doll Cleaning Kit: Key Specifications
| SpecificationDetails | |
|---|---|
| Product | Silicone Sex Doll Cleaning Kit |
| Model | LLD-C001 |
| Water temperature | ≤40°C / 104°F |
| Recommended water container | ≥1.5 L |
| Automatic rotating cycle | Approx. 65 seconds |
| Automatic flushing time | Approx. 1 minute |
| UV sanitizing time | Approx. 30 minutes |
| UV power input | 5V |
| Cleaner battery capacity | 1200mAh |
| Battery voltage | 3.7V |
| Charging voltage | 5V |
| Charging current | 500mA |
| Approx. full charging time | 3 hours |
| Automatic shutdown | 3 minutes after powering on without operation |
| Included drying rods | 2 reusable rods |
These specifications are taken directly from the supplied product manual.
How Often Should You Clean a Silicone Sex Doll?
For hygiene and routine maintenance, cleaning should be performed after use, particularly when bodily fluids, lubricant, or other residue may remain inside the internal cavity.
A practical routine is:
After use → Flush → Drain → Absorb remaining moisture → Sanitize when needed → Dry → Store
The key is not simply washing the cavity, but also removing residual water before long-term storage.
Common Cleaning Mistakes to Avoid
1. Using water that is too hot
Do not exceed 40°C / 104°F for flushing water. Higher temperatures may increase the risk of burns and are outside the recommended operating range.
2. Using dirty or contaminated water
Hair, mineral deposits and other debris can enter the pump and cause malfunctions.
3. Leaving water inside the cavity
Residual water can remain after flushing. Use the supplied absorbent rod to remove excess moisture.
4. Turning on the UV wand before inserting it
The manual specifically instructs users to insert the glass tube into the cavity before connecting the UV power supply.
5. Removing the UV wand before disconnecting power
Always disconnect the power first and then remove the wand from the cavity.
6. Submerging the entire cleaning device
The main unit should not be soaked or boiled, even though it has a water-resistant design.
Final Takeaway
A proper silicone sex doll cleaning routine involves more than simply rinsing the internal cavity. Flushing, moisture removal, optional UV sanitization, equipment drainage, and proper storage all play a role in maintaining the doll and cleaning equipment over time.
With an electric cleaning kit, the basic workflow is straightforward:
Flush → Drain → Dry → Sanitize → Store
Following the manufacturer's temperature limits, operating instructions, and UV safety precautions can make routine doll maintenance more consistent and easier to manage.